让我们构建一个 Rust Todo 应用程序
在这个故事中,我们将使用使用 gRPC 的 Rust 创建一个基本的 Todo 应用程序。首先,我想简要介绍一下 gRPC 和 Protocol Buffers。
什么是 gRPC?
gRPC 是一个现代开源的高性能远程过程调用 (RPC) 框架,可以在任何环境中运行。
RPC 代表 Remote Procedure Call,开头的 g 代表 General Purpose,或者对于某些人来说它代表 Google。但实际上,您可以在这里看到:g_stands_for,gRPC 团队在每个版本中都会更改 g 的含义 :)
我假设您熟悉常见的 REST API。它们通过 JSON 对象进行通信,在 gRPC 而不是 JSON 中,我们使用协议缓冲区来序列化数据。
Protocol Buffers
Protocol Buffers 是 Google 用于序列化结构化数据的语言中立、平台中立、可扩展机制。
在 gRPC 中,传输的数据(序列化)是二进制形式的。因此这意味着它比 JSON 或 XML 更快,因为它占用的空间更少,而且空间越小,带宽就越小。
将 gRPC 与 Rust 一起使用
首先,创建一个新的货物包。
cargo new rust-grpc现在,在创建 cargo 包之后,我们必须为 gRPC 添加一些依赖项,并在 Cargo.toml 中为我们的服务器和客户端二进制文件创建二进制定义。
[[bin]]
name = "grpc-server"
path = "src/server.rs"

[[bin]]
name = "grpc-client"
path = "src/client.rs"

[dependencies]
tonic = "0.7"
prost = "0.10"
tokio = { version = "1.19", features = ["rt-multi-thread", "macros"] }

[build-dependencies]
tonic-build = "0.7"创建您的原型文件。
proto/todo.proto
syntax = "proto3";

import "google/protobuf/empty.proto";

package todo;

message TodoItem {
    string name = 1;
    string description = 2;
    int32 priority = 3;
    bool completed = 4;
}

message GetTodosResponse {
    repeated TodoItem todos = 1;
}

message CreateTodoRequest {
    string name = 1;
    string description = 2;
    int32 priority = 3;
}

message CreateTodoResponse {
    TodoItem todo = 1;
    bool status = 2;
}

service Todo {
    rpc GetTodos(google.protobuf.Empty) returns (GetTodosResponse);
    rpc CreateTodo(CreateTodoRequest) returns (CreateTodoResponse);
}
这是 Proto 文件的语法。 先说一下proto文件的语法:
将 Proto 文件编译为 Rust 代码。
build.rs
fn main() -> Result<(), Box> {
    tonic_build::configure()
        .compile(&["proto/todo.proto"], &["proto"])
        .unwrap();
    Ok(())
}
服务器代码
src/server.rs
use std::sync::Mutex;
use tonic::{transport::Server, Request, Response, Status};
use todo::todo_server::{TodoServer, Todo};
use todo::{TodoItem, GetTodosResponse, CreateTodoRequest, CreateTodoResponse};

pub mod todo {
    tonic::include_proto!("todo");
}

#[derive(Debug, Default)]
pub struct TodoService {
    todos: Mutex>
}

#[tonic::async_trait]
impl Todo for TodoService {
    async fn get_todos(&self, _: Request<()>) -> Result, Status> {
        let message = GetTodosResponse {
            todos: self.todos.lock().unwrap().to_vec()
        };

        Ok(Response::new(message))
    }

    async fn create_todo(&self, request: Request) -> Result, Status> {
        let payload = request.into_inner();

        let todo_item = TodoItem {
            name: payload.name,
            description: payload.description,
            priority: payload.priority,
            completed: false
        };

        self.todos.lock().unwrap().push(todo_item.clone());

        let message = CreateTodoResponse {
            todo: Some(todo_item),
            status: true
        };

        Ok(Response::new(message))
    }
}

#[tokio::main]
async fn main() -> Result<(), Box> {
    let addr = "0.0.0.0:50051".parse().unwrap();
    let todo_service = TodoService::default();

    Server::builder()
        .add_service(TodoServer::new(todo_service))
        .serve(addr)
        .await?;

    Ok(())
}
让我们快速看看这里发生了什么。
客户代码
src/client.rs
use todo::todo_client::TodoClient;
use todo::{CreateTodoRequest};

pub mod todo {
    tonic::include_proto!("todo");
}

#[tokio::main]
async fn main() -> Result<(), Box> {
    let mut client = TodoClient::connect("http://0.0.0.0:50051").await?;

    let request = tonic::Request::new(());

    let response = client.get_todos(request).await?;

    println!("{:?}", response.into_inner().todos);

    let create_request = tonic::Request::new(CreateTodoRequest {
        name: "test name".to_string(),
        description: "test description".to_string(),
        priority: 1,
    });

    let create_response = client.create_todo(create_request).await?;

    println!("{:?}", create_response.into_inner().todo);

    Ok(())
}
同样,让我们快速看看这里发生了什么。
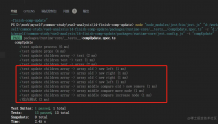
现在完成所有这些,构建,运行服务器二进制文件,等待它启动,然后运行客户端二进制文件。
cargo build
cargo run --bin grpc-server
cargo run --bin grpc-client
我希望它也对你有用。
如果没有,您可能必须根据您的操作系统安装 protobuf 包来编译您的 proto 文件。 我选择在 Docker Container 中运行我的应用程序
关注七爪网,获取更多APP/小程序/网站源码资源!
| 留言与评论(共有 0 条评论) “” |